💫
리눅스(Linux) 3-Tier Architecture
October 02, 2022
3-Tier Architecture
1. 3-Tier Architecture
- WEB - WAS(PHP) - DATABASE
- Apache, PHP, MariaDB 연동해서 게시판(그누보드) 만들기
- 편의를 위해 강의에서는 하나의 서버에 WEB-WAS-DB 모두 구축 (일반적으로는 각 서버를 분리)
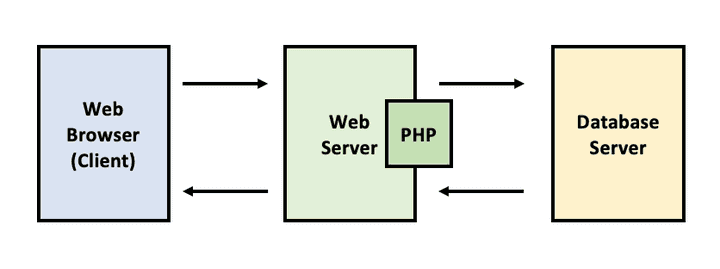
1. MariaDB 설치
- 데이터베이스를 생성하고 관리하는 시스템
- 데이터베이스 관리 시스템(database management system, DBMS)
- 오픈소스 DBMS: MariaDB
- MariaDB를 설치하고 DB 관리자 패스워드를 설정한다.
# MariaDB 설치
ttabae@ubuntu:~/lfcs-exam$ sudo -i
[sudo] password for ttabae:
root@ubuntu:~# apt update
Get:1 http://security.ubuntu.com/ubuntu focal-security InRelease [114 kB]
...(생략)...
root@ubuntu:~# apt install mariadb-server mariadb-client -y
...(생략)...

# MariaDB 서비스 실행확인
root@ubuntu:~# systemctl status mariadb.service
● mariadb.service - MariaDB 10.3.34 database server
     Loaded: loaded (/lib/systemd/system/mariadb.service; enabled; vendor prese>
     Active: active (running) since Sat 2022-09-24 03:11:19 PDT; 1min 32s ago
       Docs: man:mysqld(8)
             https://mariadb.com/kb/en/library/systemd/
   Main PID: 105248 (mysqld)
     Status: "Taking your SQL requests now..."
      Tasks: 31 (limit: 4583)
     Memory: 63.4M
     CGroup: /system.slice/mariadb.service
             └─105248 /usr/sbin/mysqld

# 최초 실행히 mysql database 관리자(root 사용자)의 패스워드를 설정
root@ubuntu:~# mysqladmin -u root -p password 'pass'
Enter password:<linux_root_password>

# 관리자 비밀번호를 변경했다면 아래 명령어를 이용해 DB에 접근
root@ubuntu:~# mysql -u root -p
Enter password: <pass>
Welcome to the MariaDB monitor.  Commands end with ; or \g.
Your MariaDB connection id is 37
Server version: 10.3.34-MariaDB-0ubuntu0.20.04.1 Ubuntu 20.04

Copyright (c) 2000, 2018, Oracle, MariaDB Corporation Ab and others.

Type 'help;' or '\h' for help. Type '\c' to clear the current input statement.

# 간단한 데이터베이스 목록 실행해보기.
MariaDB [(none)]> show databases;
+--------------------+
| Database           |
+--------------------+
| information_schema |
| mysql              |
| performance_schema |
+--------------------+
3 rows in set (0.003 sec)

# DB 연결 종료
MariaDB [(none)]> exit
Bye
2. Apache Web Server 설치
-
Web Server: NGINX, Apache
-
Apache2를 설치하고 서비스 동작해보기.
# 아파치 설치
root@ubuntu:~# apt install apache2 curl -y
root@ubuntu:~# systemctl status apache2
● apache2.service - The Apache HTTP Server
     Loaded: loaded (/lib/systemd/system/apache2.service; enabled; vendor prese>
     Active: active (running) since Sat 2022-09-24 03:25:17 PDT; 34s ago
       Docs: https://httpd.apache.org/docs/2.4/
   Main PID: 107325 (apache2)
      Tasks: 55 (limit: 4583)
     Memory: 4.9M
     CGroup: /system.slice/apache2.service
             ├─107325 /usr/sbin/apache2 -k start
             ├─107326 /usr/sbin/apache2 -k start
             └─107327 /usr/sbin/apache2 -k start

Sep 24 03:25:16 ubuntu systemd[1]: Starting The Apache HTTP Server...
Sep 24 03:25:17 ubuntu apachectl[107324]: AH00558: apache2: Could not reliably >
Sep 24 03:25:17 ubuntu systemd[1]: Started The Apache HTTP Server.

# 간단한 웹페이지 생성 후 웹 서버 동작 확인
root@ubuntu:~# cd /var/www/html
root@ubuntu:/var/www/html# cat > index.html
Building APM
(Ctrl + d)
root@ubuntu:/var/www/html# cd
root@ubuntu:~# curl localhost
Building APM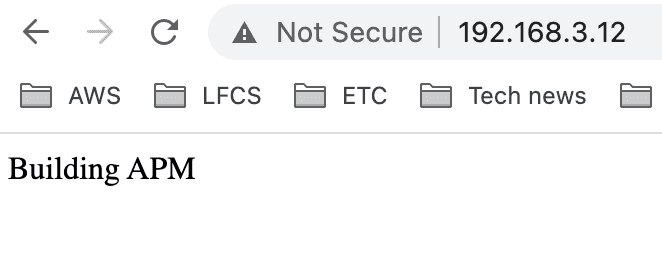
3. PHP 설치
-
PHP 설치 후 Apache와 연동되었는지 확인
-
Apache → 동적(dynamic) 한 프로그램을 받아줄 수 없음 ⇒ PHP 필요
-
PHP는 Apache와 연동되어야 한다: libapache2-mod-php 설치
-
PHP와 mysql 연동: php-mysql
-
PHP에서 Graphic을 사용: php-gd
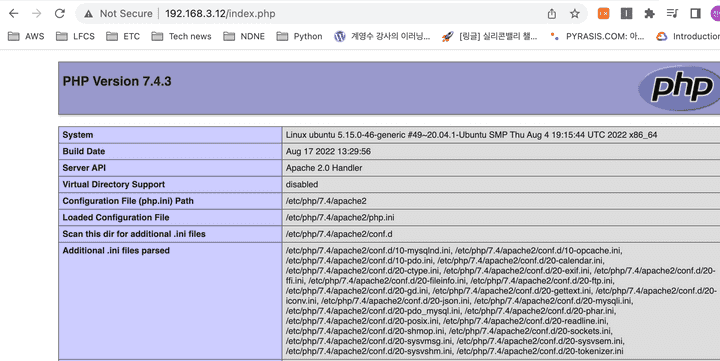
root@ubuntu:~# apt install php libapache2-mod-php php-mysql php-gd -y root@ubuntu:~# cd /var/www/html root@ubuntu:/var/www/html# cat > index.php <?php phpinfo(); ?> (Ctrl + d) ttabae@ubuntu:~/lfcs-exam$ cd- phpinfo() (현재 php 상태를 보여주는 함수) 라는 함수를 동작하도록 작성
-
브라우저에서 테스트 진행
4. 그누보드(게시판) 설치
-
gnuboard 설치 (sir.kr 사이트 참조)
root@ubuntu:~# wget https://github.com/gnuboard/gnuboard5/archive/5.3.2.0.tar.gz root@ubuntu:~# tar -zxvf 5.3.2.0.tar.gz root@ubuntu:~# ls 5.3.2.0.tar.gz gnuboard5-5.3.2.0 snap root@ubuntu:~# mv gnuboard5-5.3.2.0 gnuboard root@ubuntu:~# ls 5.3.2.0.tar.gz gnuboard snap root@ubuntu:~# mv gnuboard5-5.3.2.0 gnuboard root@ubuntu:~# ls 5.3.2.0.tar.gz gnuboard snap root@ubuntu:~# mv gnuboard/ /var/www/html/ root@ubuntu:~# cd /var/www/html/gnuboard/ root@ubuntu:/var/www/html/gnuboard# ls adm extend img mobile tail.php bbs g4_import.php index.php perms.sh tail.sub.php _common.php g4_import_run.php install plugin theme common.php _head.php js README.md config.php head.php lib skin css head.sub.php LICENSE.txt _tail.php-
gnuboard 접속
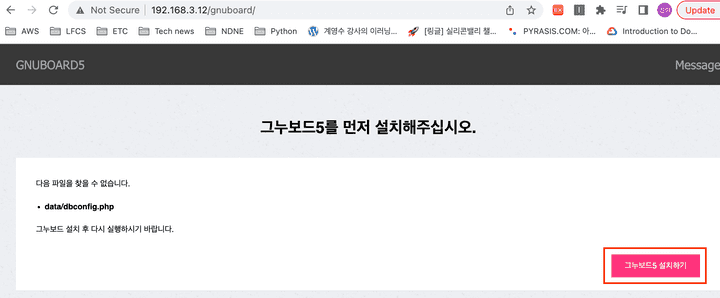
- 이후 안내대로 진행
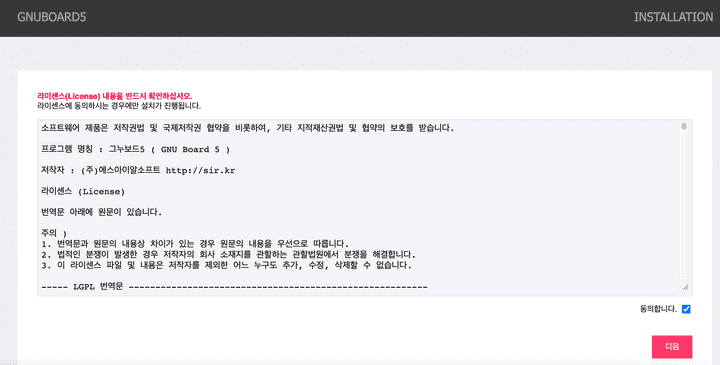
root@ubuntu:/var/www/html/gnuboard# mkdir data root@ubuntu:/var/www/html/gnuboard# chmod 707 data ## + 브라우저 새로고침 ##- 브라우저를 새로고침하면 라이선스 동의 페이지로 이동됨 → 동의
-
mysql 사용자와 그누보드를 연동해야한다. 그 전에 그누보드를 위한 데이터베이스/유저/비밀번호를 생성하자.
- user:
btcuser - password:
pass - 관리 DB:
gnuboard
# DB 접속 root@ubuntu:/var/www/html/gnuboard# mysql -u root -p Enter password: Welcome to the MariaDB monitor. Commands end with ; or \g. Your MariaDB connection id is 38 Server version: 10.3.34-MariaDB-0ubuntu0.20.04.1 Ubuntu 20.04 Copyright (c) 2000, 2018, Oracle, MariaDB Corporation Ab and others. Type 'help;' or '\h' for help. Type '\c' to clear the current input statement. # GNU board를 위한 데이터베이스 생성 MariaDB [(none)]> create database gnuboard; Query OK, 1 row affected (0.003 sec) MariaDB [(none)]> show databases; +--------------------+ | Database | +--------------------+ | gnuboard | | information_schema | | mysql | | performance_schema | +--------------------+ 4 rows in set (0.002 sec) # GNU board를 위한 관리자 계정 생성 MariaDB [(none)]> grant all privileges on **gnuboard.*** to **btcuser**@localhost identified by '**pass**'; Query OK, 0 rows affected (0.011 sec) MariaDB [(none)]> exit Bye - user:
-
그누보드에 생성한 DB 정보 입력
- MySQL 정보 입력 → 위에서 생성한 database와 관리자계정 정보 입력
- 최고 관리자 정보 입력 - 게시판 관리자 정보
- admin / pass / admin@domain.com
-
설정이 완료되면
새로운 그누보드5로 이동버튼 클릭 -
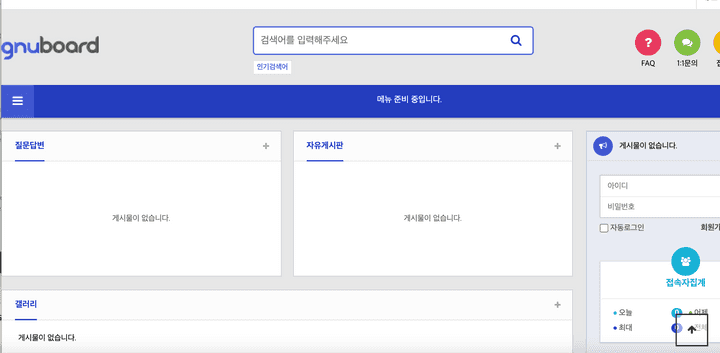
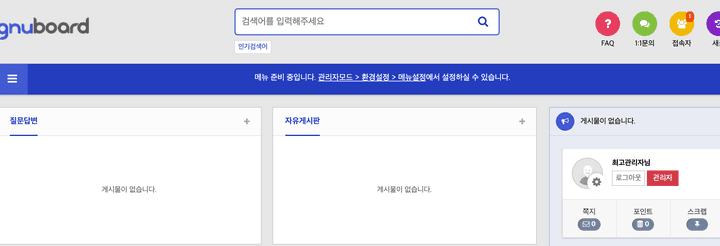
메인 그누보드 화면에서 위에서 입력한 최고 관리자 정보를 이용해 로그인할 수 있다.
-